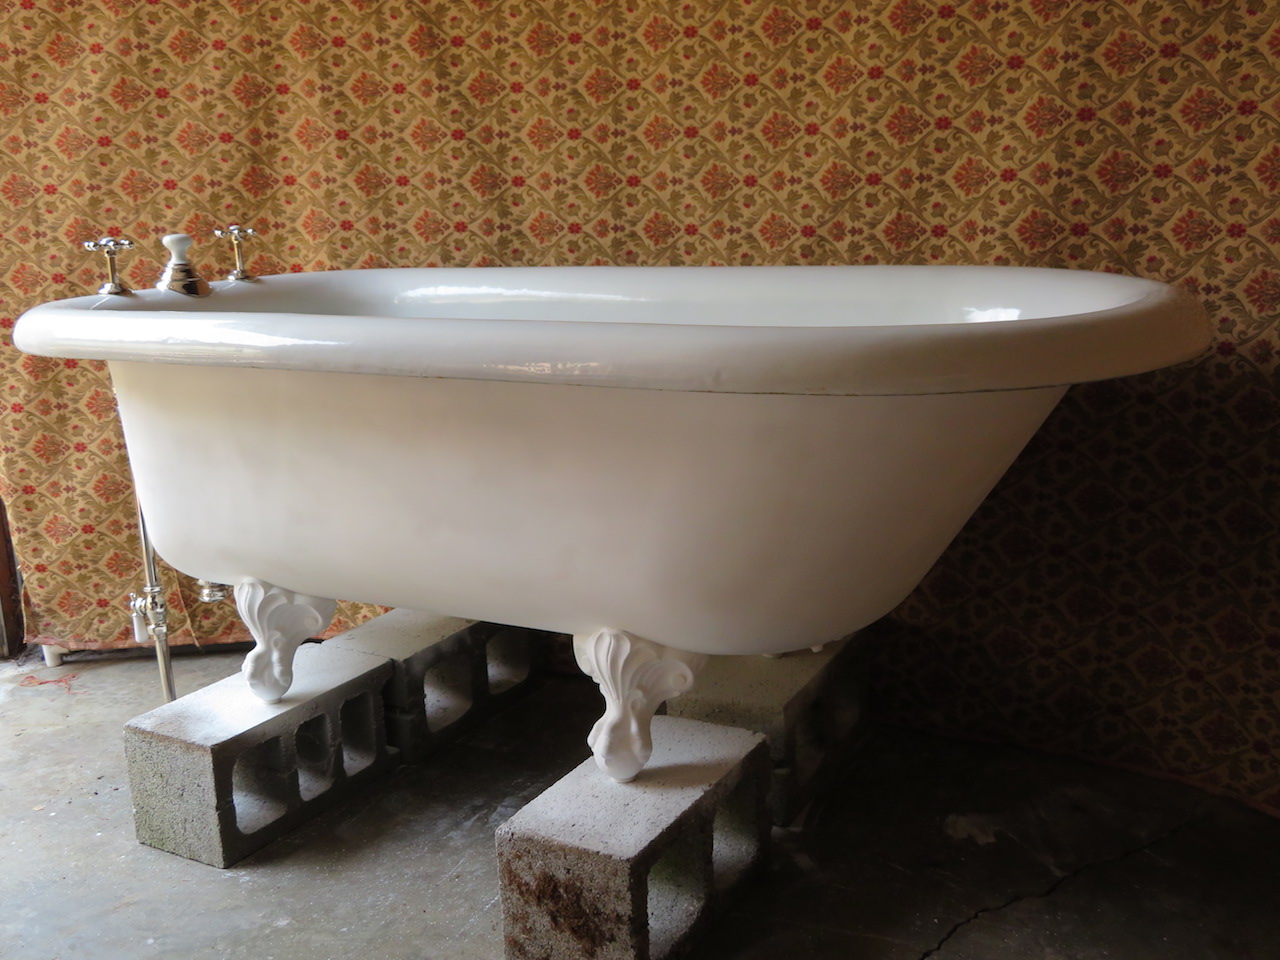
This 1911
"Standard" claw foot "Taft" tub is ready for a new home. It measures 66" x 34".
 |
| The Standing Waste kit is fully restored to full function and beauty. |
 |
| On blocks in order to complete the exterior resurfacing. The tub's exterior walls were originally plastered except for under the rim and under the tub. There was damage to the plaster coating and that was repaired. Now the tub is primed and ready for paint. |
|
 |
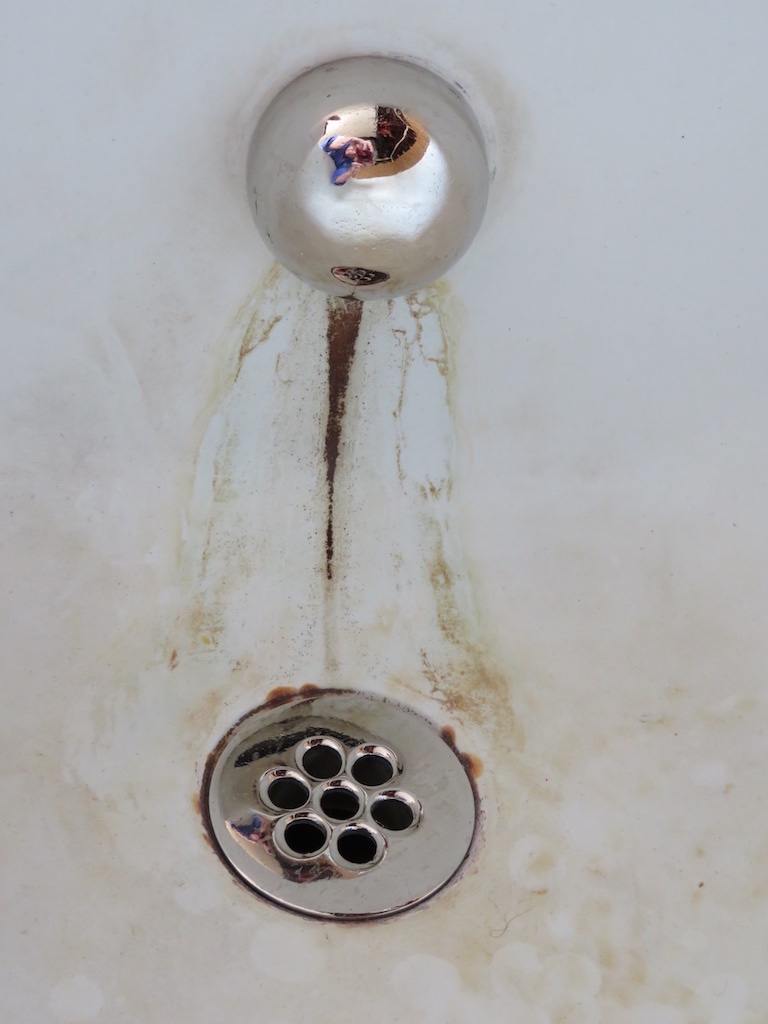
| The tub leaked so long that the porcelain has been eroded under the button spout. |
 |
| There is also some staining in the porcelain . |
 |
| Date of foundry pour. The bottom of the tub was not plastered smooth. |
 |
| "Standard" Made in USA |
 |
| The claw feet are full balls, including the rear claw. They have never been removed, Note the square nail holding the foot to the tub. |
 |
| Before and after solder work to build the valve bodies back to fully spherical. |
Years ago, before I had the skills and the tools to restore it, I was given a vintage Standard claw foot tub. The tub was originally installed in a home built in the Laurelhurst neighborhood of Portland Oregon. I was called because the hot and cold valves would no longer fully stop water from running into the tub. The supply risers had service valves and those must have been used to control the water for a number years because they also would no longer control the flow of water. I was told by my client that water had leaked into the fixture for eight years by that time.
As a plumber my concern was to stop the incessant leak. I wasn’t there to perform a restoration on the fixture. The obvious place to begin was the service valves. I would need to turn all of the house water off to repair them. Once they would work I could isolate the fixture to work on the main valves. Once the water was turned off and the pipes were drained down to the floor below I removed the valve stems of the tubs service valves. The bib washers were worn out and unfortunately the brass seats the washers seal to were worn out as well. The valve seats were of course milled directly into the bodies of the valves as was done with service valves then and even now to a large extent. Those brass seats were rough and one had a fair-sized gap that allowed the water to leak past even with a new washer. The old school way of stopping the leak was to use one of those toothed hand-grinding tools to grind the seat back to good brass so the new washer would come to rest against a smooth surface once more. At that time, I was using a moto tool to do the same thing. I was able to machine the seat surfaces down to good brass on both hot and cold valves. After that the rebuilding of those valves was routine. I changed the washers and seals then reassembled the valves. They worked well enough to finally stop the leak.
Next I turned my attention to the tubs main valves. Those valves also had seats that were milled directly into the brass valve bodies and like the service valves the seats were rough and notched. Grinding the main valves seats would not be a good option as the gap in the brass seat was too deep and there would be no seat left if I ground down past the gap. I told the client that I would have to think of a strategy and that I would contact her when I had a plan for the work. The client contacted me a few times and I still had no way to make the needed repairs. The valves themselves are too unique to be replaced; they would need to be rebuilt but as I said above, I didn’t at that time have the tools or skills to rebuild them. Aside from that I was still a full time plumber at that time and was always busy. When six months had gone by and I was no closer to a solution, she asked me if I wanted the tub as she had decided to replace it.
I accepted her offer. In consideration of the gift and because I was somewhat chagrined that I hadn’t been able to complete the repair, I removed the tub at no charge. The tub was on the second floor of a fine old craftsman-era home and I had no way to safely remove it from the house so I contacted a moving company and had them remove it. I disconnected the water and waste pipes from the tub and they took it out of the house. The moving company delivered the tub to me and it went into storage here at my home shop.
The reason I was willing to do so much to get and eventually begin to restore the tub was its size, shape, features, and the beautiful standing waste that was fitted to it. The tub is sixty six inches long and thirty four inches wide. It has a single backrest with the standing waste set on the other end. The standing waste controls sit atop the extra-wide rim of the tub making it what’s called a “through the rim tub”. The outside of the tub has been plastered smooth, covering the normal rough surface of a sand-cast fixture. The feet are not the normal cast iron claw foot that is hollow in the back. They are full balls with a fourth claw in the back. The cast iron itself is much thicker than normal, making the tub much heavier than a normal three hundred fifty pound tub. I don’t know what the tub weighs but I would think between five and seven hundred pounds dry.
I worked on the fixture from time to time when paying work was caught up. I took the standing waste kit apart and cleaned all parts thoroughly; I had decided from the beginning that I would have all of the parts re-plated in polished nickel.
The main valves were still the biggest problem I would have to solve. Those valves were originally beautifully cast so that the bodies had a spherical shape. Not only were the seats in very bad condition but the valve bodies had been partially flattened by large wrenches that had been used on them. The wrenches had been placed on the thinnest sections of the brass and the spherical shape was lost, destroying some of the visual appeal of the valves. I considered everything that came to mind, including having new valve bodies cast in a foundry and hiring a machinist to complete the remanufacture of those replacement valves.
As years went by I continued to develop my skills. I was even able to obtain vintage tools that were made to reseat that kind of valve by cutting threads into the original water port and threading new brass or bronze seats into the valve body. As for the damaged shape of the valve bodies I formed a plan for that after I began working with a new plating company. The plating company I had been working with would fill deep wrench scars before they plated the parts. I asked the new plater about that and he encouraged me to do the filling myself. When I showed him the damaged valve bodies he told me I should be able to do it with a good lead free solder; then he would plate the finished valves. I decided he was right and entered into this line of work to expand my skills and work on projects that were new and interesting to me. Reforming the valves for my tub qualified on both fronts.
It took a lot of time and patience, not to mention solder, to make those valves look like they once had. I added solder and then hand tooled it with a shallow-toothed rasp. I laid on layer after layer of solder until the coatings were too thick and then had to remove some of the solder to try to restore the spherical shape of the valve. There was definitely a learning process and it probably took longer than it should have but in the end I was happy with the result.
What I have done with the standing waste kit is:
• I fully restored the main valves.
• I had new stems and bonnets custom made. My plater buffed them to remove any sharp angles recreating the soft lines of a true vintage fixture.
• I reseated the bodies so that the washers on the new stems fit down to new brass.
• I made new gaskets and repacked the stems with new packing
•
• I tested the valves at normal house pressure to ensure the function is fully restored.
•
• I recreated the original shape of the valves to restore the original esthetic.
• I replaced the original brass supply risers with new brass, polished and plated in nickel as are all of the parts. I made them short enough to allow new service valves to be set into them above the floor level. Below the service valves new brass pipe will carry the supply riser to below the floor.
• The original waste pull and its tube were missing when I received the tub. I assembled vintage original “Standard” parts, including the porcelain drain pull, to create an inner tube that is indistinguishable from what was once there when in place. It functions to hold water in the tub to the standard of the time, being that the functionality is original.
• The button spout and drain strainer are original parts, as are the yoke assembly, supply nuts, spout tube assembly, outer drain tube assembly, and the trims at the tub rim penetrations.
• The horizontal tailpiece at the drain boot is new brass tubing. A new nickel plated brass vertical tailpiece (not shown in photos) will be provided.
Altogether the restoration of this tub has been a journey in microcosm, part of my overall journey from residential plumber to restoration artisan. It came to me at about the time of the inception of plumbing-geek.com and, like the creation of the website, many many hours have gone into it to make it what it is today.
This beautiful tub is available for sale at
www.plumbing-geek.com.